By the Jordan Pumps team, Kempton Park | Pumps You Can Trust
This page summarises how to install and look after the Jordan 55W UV Water Sterilizer (12 GPM). Please read the full installation manual before you start.
📄 Download the full installation manual (PDF)
The manual covers both the 55W (12 GPM) and the 110W (24 GPM) models. The steps are the same for both.
Safety first
- The UV lamp contains mercury. If a lamp breaks, don't breathe in or swallow the debris, and keep it away from your eyes and skin. Never use a vacuum cleaner to clean it up, as this can scatter the mercury. Dispose of it according to local regulations for mercury waste.
- Check for water before switching on. Never plug the system in if there is water on parts that shouldn't be wet, such as the ballast (controller) or the lamp connector.
- Indoor use only. Protect the unit from the weather and from freezing temperatures. It is not intended for outdoor use, or for use in or above water, or in swimming pools while people are swimming.
- Use an earthed, earth-leakage protected supply. The manual requires a properly earthed socket with ground-fault (earth-leakage) protection, close to a known good earth, and installation by a qualified electrician in line with local regulations.
- Match the power supply. The electrical supply must match the power requirements shown on the unit.
- Protect the ballast from surges. A surge protector is strongly recommended.
- Extension cords: if you must use one, use only an undamaged, 3-core earthed extension cord rated at least as high as the system.
- Keep away from children. The system should not be handled by children, or by anyone without the right experience, unless they are supervised or have been shown how.
Know the limits
The sterilizer is designed for visually clear water, not water that is coloured, cloudy or turbid. It is not intended for water with obvious contamination, such as raw sewage, and it is not meant to turn wastewater into drinking water. That's why we recommend filtering the water first.
What's included
- Reactor chamber (304 stainless steel)
- Quartz tube
- O-rings (2)
- Open end nut
- Closed end nut
- UV lamp
- 4-pin electrical socket
- Cover cap
- Electronic ballast
- Plastic brackets
Water filters are not included.
Where to install it
- After everything else. Install the sterilizer after all other water equipment, such as filters, carbon filters, water softeners, reverse osmosis units, pressure tanks and pumps. This reduces the chance of treated water being re-contaminated by bacteria in those units.
- Close to the point of use. The closer it is to where you use the water, the less chance of re-contamination in the pipes after it.
- Dry, well-lit and easy to reach. Leave at least one chamber length of free space at the lamp end, so you can remove the lamp and quartz sleeve, about 15 cm (6 inches) at the other end, and about 45 cm (18 inches) between the unit and the floor.
- Metal on the outlet. Because of heat expansion and UV exposure, use metal fittings and at least 25 cm (10 inches) of copper pipe on the outlet of the UV chamber.
- Horizontal or vertical. The unit can be mounted either way, and the chamber heads can be rotated independently to suit your pipework.
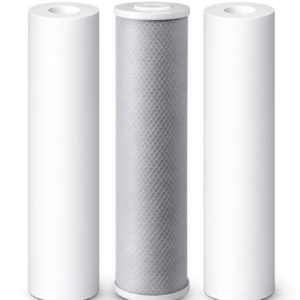
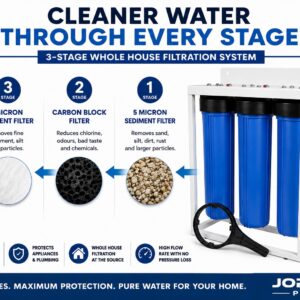
A typical setup is a 3-stage water filter first, then the UV sterilizer as the final stage.
Step-by-step installation
Before you start: make sure the quartz tube and UV lamp are clean. Clean them with alcohol or a mild detergent, and wear soft, non-abrasive gloves so you don't leave finger marks on them.
- Remove the closed end nut from the closed end of the reactor chamber.
- Remove the open end nut from the open end of the reactor chamber.
- Fit an O-ring onto the open end of the quartz tube, about 1 cm (0.5 inch) from the edge.
- Insert the quartz tube into the reactor chamber.
- Fit the second O-ring onto the closed end of the quartz tube.
- Hand-tighten the closed end nut onto the reactor chamber, over the closed end of the quartz tube, to protect the O-ring. Do not over-tighten.
- Connect the 4-pin electrical socket firmly to the UV lamp pins.
- Carefully slide the UV lamp into the quartz tube through the open end nut.
- Fit the cover cap and hand-tighten it onto the open end nut.
- Mount the system in an easy-to-reach, well-lit spot, as close to the point of use as possible, horizontally or vertically.
- Once all the plumbing connections are done, slowly turn on the water supply and check for leaks.
- Let the water run for a few minutes to clear any air or dust from the reactor chamber, then connect the power to start up.
Checking that it's working
An LED light on the ballast shows that the UV lamp is on. It confirms the lamp is working, but it does not measure the UV intensity or how well UV passes through your water. The ballast also has a built-in audible alarm that sounds if the lamp fails.
Changing the lamp or quartz sleeve
The end caps let you change the lamp quickly, with no tools and without disconnecting the water supply or draining the unit. The manual doesn't include a separate replacement procedure, so follow the installation steps above: take care with the 4-pin connector and the O-rings, clean the new lamp or quartz tube before fitting it, wear soft gloves, and hand-tighten only. Always unplug the power before you touch the lamp, and remember the lamp contains mercury (see Safety first above).
Need a hand? Contact us or call +27 82 888 0118 and we'll help.
Get the sterilizer
The Jordan 55W UV Water Sterilizer (12 GPM) comes with a 6-month manufacturer's warranty. We deliver nationwide, and you can pay with Payflex.